

Budgetbaby,

I was rummaging through my sister's drawer (I asked permission lol) to find something and I passed by this Nichido Naturally Beautiful eyeshadow palette which she bought a long time ago but used 1-2 times only. So I added this to my "review" lists. I forgot the price of this product but I know that all Nichido products are pretty affordable.
It looks like this:


(sorry for the scratches this was bought a long time ago)
The product contains seven shimmery eyeshadows and two matte blushes. It also includes an eyeshadow brush (ours is damaged huhu).
Swatched 2-3 times using fingers (colors from left to right)

Swatched 2-3 times using brush (colors from left to right)

What I like about Nichido Naturally Beautiful eyeshadow palette:
1. Beginner friendly (If you're still practicing make-up)
- The reason is because it's not too pigmented and you can correct it if you make a mistake.
2. Travel friendly
- It has seven neutral eyeshadow colors and two blushes, what more do you need?
3. Budget friendly
- All Nichido products are affordable. Nuff said.
What I don't like this product:
1. The brush sucks
2. It's not that pigmented so you have to use more to make the color pop. (this is a con if you're not a beginner)
3. It doesn't have matte eyeshadows
This is the end of my product review, now I'm going to test it by adding my pretty in pink eyeshadow tutorial below.
Items you'll need:
1. Nichido naturally beautiful eyeshadow palette
2. Foundation
3. Pressed powder
4. Concealer
5. Eyeshadow brush
6. Face powder brush / sponge

Optional Items:
1. Beauty Blender
2. Primer

Step #1
Prep your face the way you like it.
My face make-up routine consists of the following:
1. Primer (Quick FX No Shine Mattifier)
2. Foundation (Maybelline Dream Matte Mousse)
3. Concealer (Shawill stick concealer)
4. Bronzer and Blush (EB Advance Blush Duo)
5. Press Powder (Maybelline Shine Free)
6. Lipstick (Nyx - I forgot the shade) - I just dabbed a little so it'll look sweet and natural.
7. Brows (Nichido eyebrow pencil in the shade of brown)


Step #3
After everything, let's move to eyeshadow. As you can see I have dark skin around my eyes so I need to prepare (Foundation + concealer) it first. This is important to avoid compromising the color of your eyeshadow.

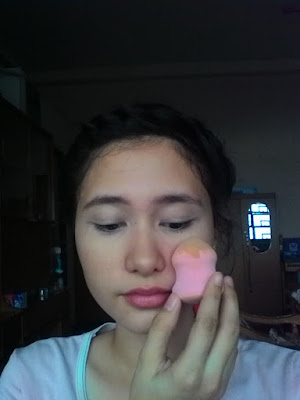
Using my Maybelline Dream Matte Mousse, I'll just dab it around my eyes. Then blend it using a beauty blender (a dupe I bought at Divisoria which costs only Php 50.00). I used my fingers on the right side to show you guys that you can blend without make up tools.


The next thing I did was put on my Shawill stick concealer (It also served as my highlight). I basically did the same thing.


Love,

Nichido Naturally Beautiful Eyeshadow Palette Review + Pretty in Pink Eyeshadow Tutorial
Helllooo! I've decided to post my first make-up tutorial after practicing so many times. I'll try to make this post very informational so you guys can learn or follow what I'm doing. I'm also open to comments and suggestions on how you all feel about my tutorial. Soo, let's start!
I was rummaging through my sister's drawer (I asked permission lol) to find something and I passed by this Nichido Naturally Beautiful eyeshadow palette which she bought a long time ago but used 1-2 times only. So I added this to my "review" lists. I forgot the price of this product but I know that all Nichido products are pretty affordable.
It looks like this:
(sorry for the scratches this was bought a long time ago)
The product contains seven shimmery eyeshadows and two matte blushes. It also includes an eyeshadow brush (ours is damaged huhu).
Swatched 2-3 times using fingers (colors from left to right)
Swatched 2-3 times using brush (colors from left to right)
What I like about Nichido Naturally Beautiful eyeshadow palette:
1. Beginner friendly (If you're still practicing make-up)
- The reason is because it's not too pigmented and you can correct it if you make a mistake.
2. Travel friendly
- It has seven neutral eyeshadow colors and two blushes, what more do you need?
3. Budget friendly
- All Nichido products are affordable. Nuff said.
What I don't like this product:
1. The brush sucks
2. It's not that pigmented so you have to use more to make the color pop. (this is a con if you're not a beginner)
3. It doesn't have matte eyeshadows
This is the end of my product review, now I'm going to test it by adding my pretty in pink eyeshadow tutorial below.
Items you'll need:
1. Nichido naturally beautiful eyeshadow palette
2. Foundation
3. Pressed powder
4. Concealer
5. Eyeshadow brush
6. Face powder brush / sponge
Optional Items:
1. Beauty Blender
2. Primer
Step #1
Prep your face the way you like it.
My face make-up routine consists of the following:
1. Primer (Quick FX No Shine Mattifier)
2. Foundation (Maybelline Dream Matte Mousse)
3. Concealer (Shawill stick concealer)
4. Bronzer and Blush (EB Advance Blush Duo)
5. Press Powder (Maybelline Shine Free)
6. Lipstick (Nyx - I forgot the shade) - I just dabbed a little so it'll look sweet and natural.
7. Brows (Nichido eyebrow pencil in the shade of brown)
Step #2
Regain your energy (HAHA)
Step #3
After everything, let's move to eyeshadow. As you can see I have dark skin around my eyes so I need to prepare (Foundation + concealer) it first. This is important to avoid compromising the color of your eyeshadow.
Using my Maybelline Dream Matte Mousse, I'll just dab it around my eyes. Then blend it using a beauty blender (a dupe I bought at Divisoria which costs only Php 50.00). I used my fingers on the right side to show you guys that you can blend without make up tools.


Step # 4
Now that your eyelids are ready, let's start with the actual eyeshadow. First thing you need to remember is just be creative in whatever you're doing.
The first thing you'll do is find neutral color to put as your base.
The reason you can't see the color is because it's so light. That's what makes it perfect.
Then, pat a light color of your choice to the inner corner of your eyes. (I normally use white on this) Remember: just dab it first, blend it after everything is in place.

As you can see, I chose a gradient style. The darkest color should be in the outer corner of your eyelids.
Now we blend it inwardly. You can use your brush or fingers on this.
Step #5
Using your pinky, dab it into your eyeshadow and slide it carefully on the bottom corner of your eye to add a smokey effect.
Step #6
Clean up by sliding a concealer on the edge of your eye then blend.
Step #7
Set your look by carefully putting your press powder on top.
Step #8
Finish your look with a mascara or eyeliner. (I skipped the eyeliner on this one)
Sooo here it is:
Okay guys I saw that my eyeshadow is not even in the picture, but I swear it's just the light playing tricks with my camera.
Love,


0 comments:
Hey love! Thank you for sharing your idea. Everyone is welcome to comment and share their thoughts. Although, please be mindful if you're going to be saying anything negative, as this blog purely focuses on sharing joy and love. Cheers!